Session control policies in Microsoft Defender for Cloud Apps - block copy, cut, and paste in web apps
In this article, I attempt to outline the process for creating session control policies using Conditional Access (CA) and Microsoft Defender for Cloud Apps or MDA for short. When I first set this up, I was unaware of the need to have a user sign in between setting up the CA policy and setting up the policy in MDCA which then allows session control policies to be applied. I will guide you through this, the policy setup and testing.
An overview of the setup process looks like this:
1. Setup the CA policy
2. Have a user login
3. Apply the MDA access policy and add your conditions.
4. Test it
1. Setup the CA policy
Pre-requisites: -
a. the app should be available as an "Enterprise App" in Azure AD. Secondly, the app should support and be configured for SAML SSO.
b. Azure AD P1 licenses are required. My understanding was always that MDA required Microsoft 365 E5 or equivalent licenses for applying policies, but Microsoft states in the following article that Azure AD P1 licenses are adequate for this type of policy: - https://docs.microsoft.com/en-us/defender-cloud-apps/session-policy-aad#prerequisites-to-using-session-policies
In CA, specify which users are to be affected by this policy as shown in the image below.
2. Log in
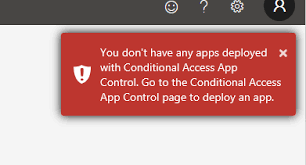
Log in to the app in question as a user. This will bring the app into the "Conditional Access App Control apps" section in MDA. If you forget to do this part, you could end up with an error. The error will look something like this and will prevent you from creating the access policy in MDA.
If you want to check if it will be ready before you try and create the policy click the cog icon for settings, then "Conditional Access App Control".
If nothing shows here, the app is not ready for session controls. You can see in the screenshot below that there are some apps available. To demonstrate this process, I am going login to Teams to show the before and after images below. Teams does not exist in the first image below.
I have now logged in as the affected user and used those services. For example, if I log in and use Teams as a user, it magically appears in the list of apps that can be controlled by CA App Control.
If you are using the Office apps as I am, you may have to get a user to login to each of the services to test it out then the apps will appear here and you are ready to add your MDCA policy.
3. Create the MDCA policy
Login to MDCA on https://portal.cloudappsecurity.com, and navigate to Control > Policies > Conditional Access. Click "Create policy" and choose "Session policy".
For the purposes of this demonstration, I am going to use the "Block cut/copy and paste based on real-time content inspection" template. This fills out the options required. The image below shows it has filled out the policy details including name, policy severity, category, and description which are all editable, you don't have to stick with the suggested input.
This means the activity will only be blocked on a device that is not all of the following: - Intune Compliant, Hybrid Azure AD Joined, and has a valid client certificate. Devices that match the criteria will be corporate devices, and therefore we exclude them from this restriction. This policy is going to be purely for BYOD devices therefore these options are valid. If I click on the "Edit and preview results" button we can see what prior activities would have been blocked. This is a recommended step to ensure the policy going to do what you think it's going to do. The image below shows what you might see.
Some of Alex Wilber's activities would have been prevented if this policy had been applied. I am happy with the filters, so I will click the "Save filters" button which will take me back to the previous screen. If I scroll down, the actions can be seen, as shown below.
As you can see above, I have selected to block cut, copy and paste actions and I have created a custom message. You could consider sending the user an email, but it is probably a bit overkill when combined with an on-screen message. As you can see above, this policy applies to web browsers apps. For mobile and desktop apps, a separate policy is required. Click the "Create" button right down at the bottom.
4. Test the policy
To test this policy, I logged in to the Microsoft 365 portal, https://portal.office.com as Alex Wilber and opened a document in Word Online, selected a bunch of text and clicked copy. This was done on a Hybrid Azure AD joined device, however NOT joined to this tenancy which is another good test. This is what happens.
This happens regardless of the method of cut or copy actions. It works for Ctrl + C, Ctrl + X, and for selecting the same actions from the right-click context menu. The only slightly annoying thing I have found is the message above appears twice. If anybody knows if there is a way around this or if this is simply a "feature" please let me know and I will update this article.


Comments
Post a Comment